User Management
Introduction
This manual provides an overview of the OCCS dashboard, detailing the User Management Model, Project Management Module, Global Settings, Record Module and Reports Module. The system includes three pre-defined groups with varying permissions and rights: SuperAdmin, Admin, and Clerk, with one SuperAdmin user.
Purpose of the Manual
The purpose of this manual is to help users understand how to navigate the system, assign permissions, and perform administrative tasks effectively.
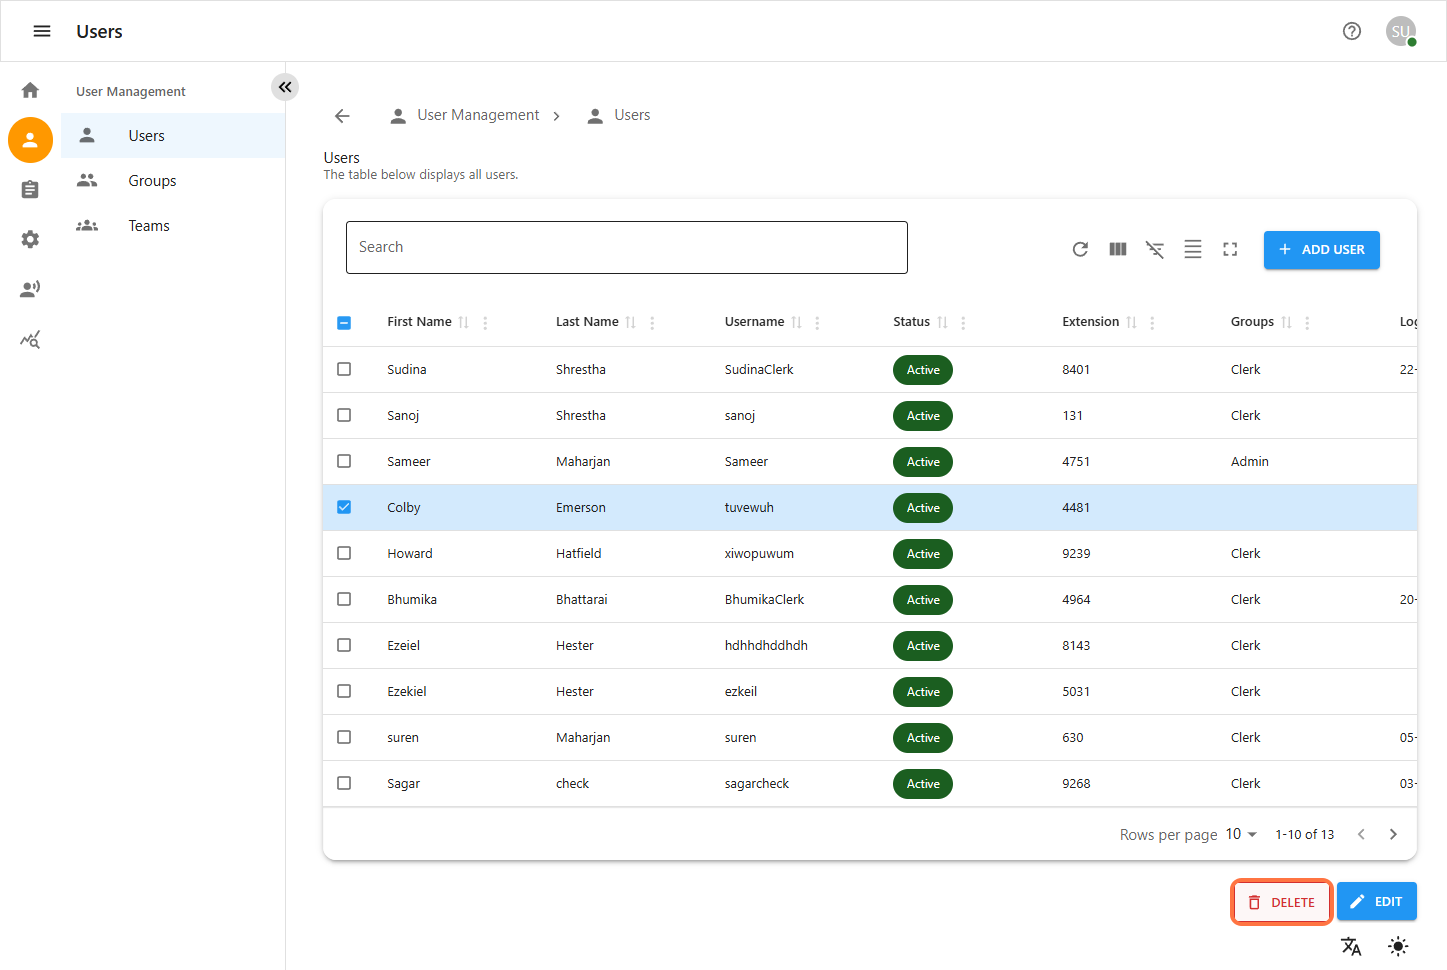
Users
The OCCS User Management Model is designed to streamline user role assignments and permission management, enabling diverse users to collaborate within teams on future projects. Upon initial setup, a user with the SuperAdmin role is created and assigned to the SuperAdmin group. Access to this module is restricted to users within the SuperAdmin group only.
1.1 User Module
The User Module enables users with the necessary permissions to manage user accounts effectively. The system includes three pre-defined groups:
-
SuperAdmin: Full system access, including administrative tasks and user management.
-
Admin: Limited administrative rights for managing select system functions.
-
Clerk: Basic access for Contact, Client, and Call-related functionalities.
Each user is assigned to a group based on their role, defining the tasks and functions they can perform. Groups are configured with specific rights to ensure users operate within their assigned permissions.
1.2 Create User
Step-by-step instructions for creating new users and assigning groups:
-
Navigate to User Management
-
Click on the User Management icon.
-
Select the Users option.
-
-
Add a New User
-
Click the Add User button.
-

-
Complete the User Details Form
-
Fill in required fields (First Name, Last Name, Username, Email, etc.)
-
Ensure the Password and Confirm Password match.
-
-
Assign the Group
-
Select the appropriate group for the user.
-
-
Create the User
-
Click Create to finalize the new user setup.
-
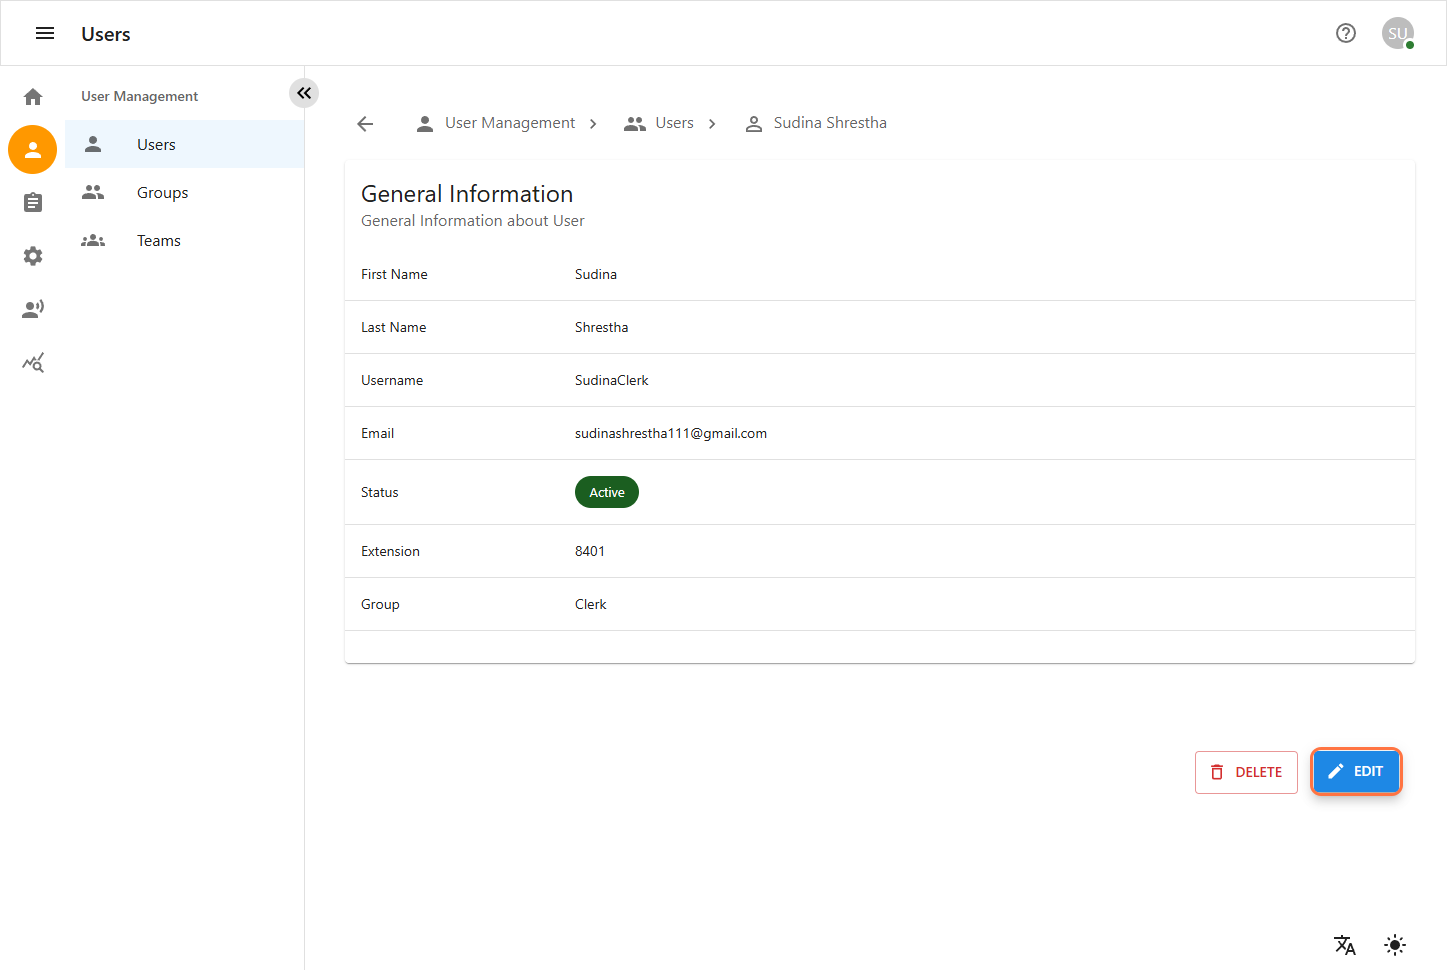
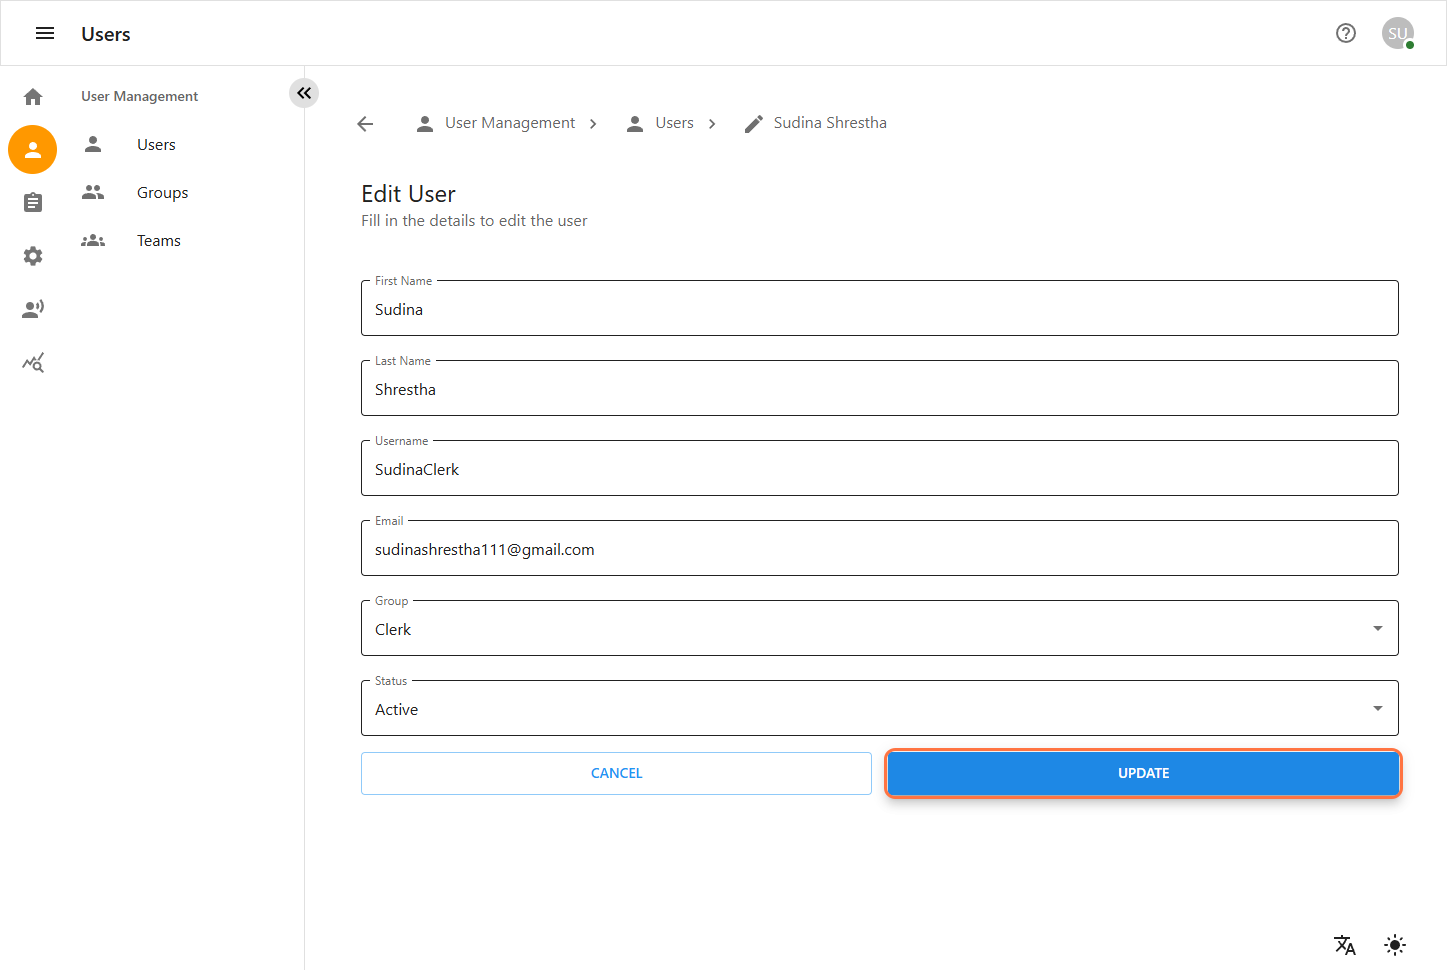
1.3 Update User
Steps for updating existing users:
-
Navigate to User Management
-
Click on the User Management icon.
-
Select the Users option.
-
-
Edit an Existing User
-
Locate the user you want to edit and select the checkbox next to it.
-
Click Edit.
-
Update fields as needed.
-
-
Update the User
-
Click Update to save changes.
-
Groups
The Group Module allows users with appropriate permissions to manage user groups effectively. The system includes three pre-defined groups with varying permissions and rights:
-
SuperAdmin: Has full access to all features and permissions within the OCCS system.
-
Admin: Has a restricted set of permissions suitable for higher-level administrative tasks.
-
Clerk: Has basic access, mainly for Contact, Client, and Call-related functionalities.
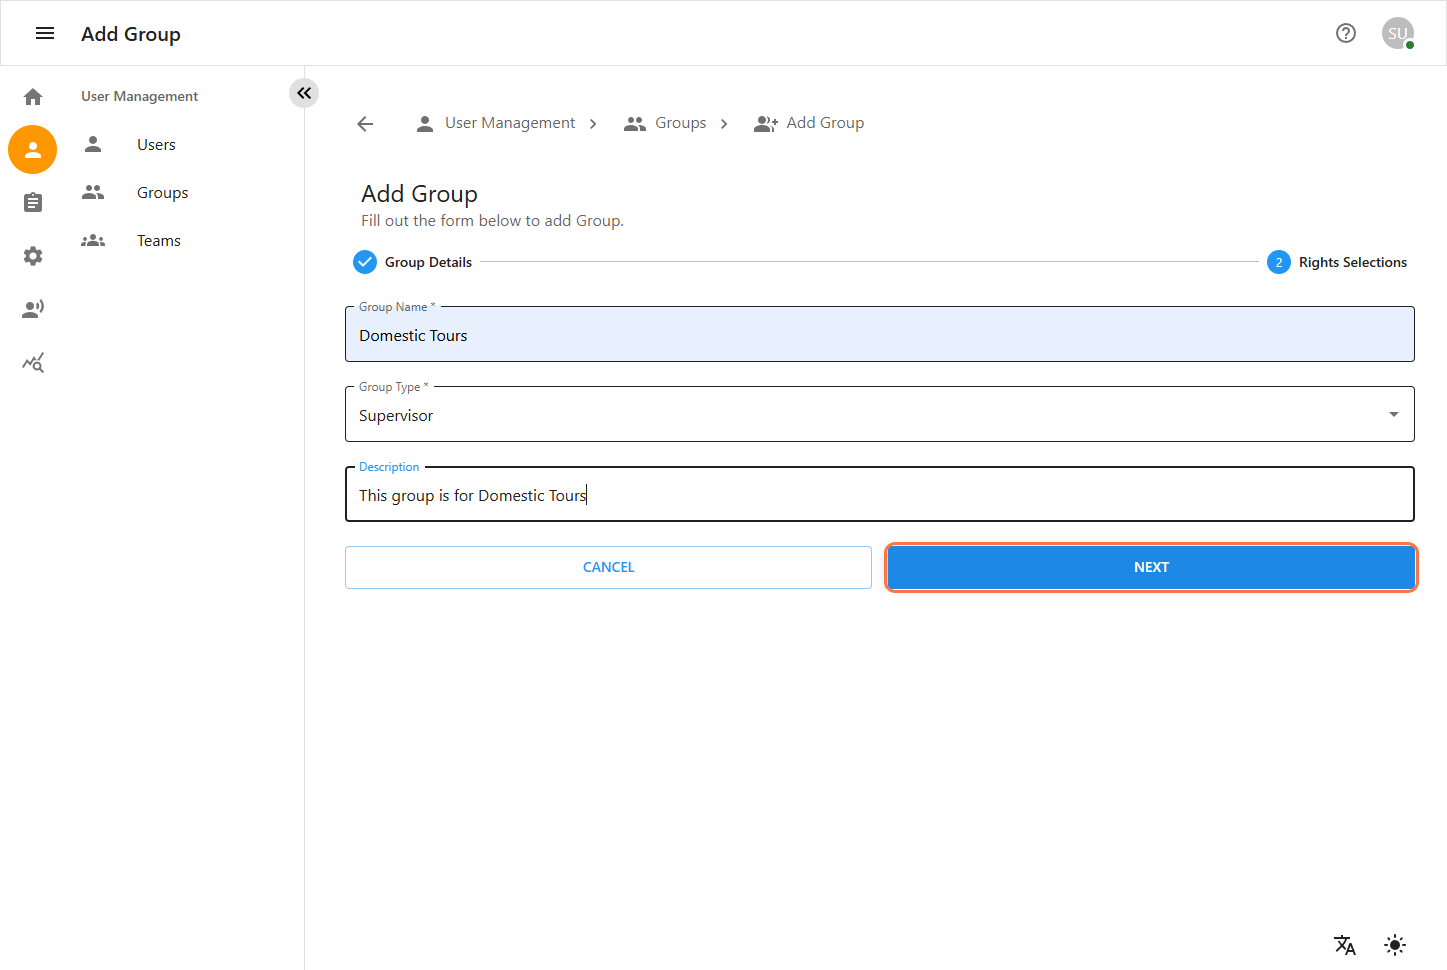
2.1 Create Group
Step-by-step instructions for creating new group, assigning roles, and setting permissions:
-
Navigate to User Management
-
From the left sidebar, click on the User Management icon.
-
Select the Groups option from the menu.
-
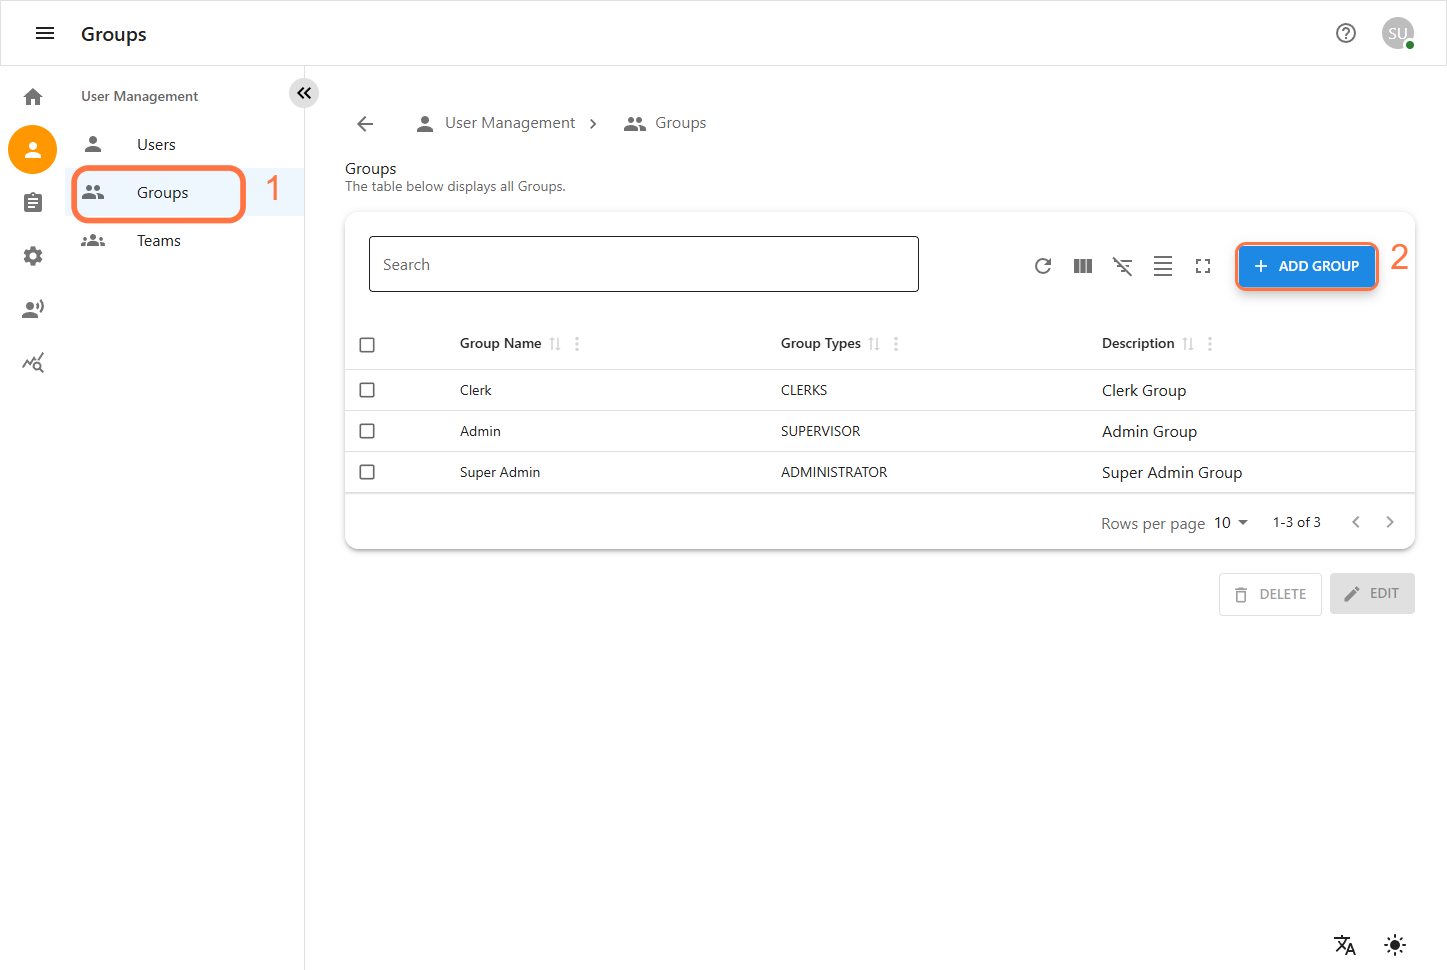
-
Add a New Group
-
Click the Add Group button to begin creating a new group.
-
-
Complete the Group Details Form
-
Fill out the required fields such as Group Name and Description.
-
Select the appropriate Group Type and click Next to proceed to the Rights Selection form.
-
-
Assign Rights and Permissions
-
In the Rights Selection form, check the boxes next to the permissions you want to assign.
-
-
Create the Group
-
Click Create to finalize the new group setup.
-
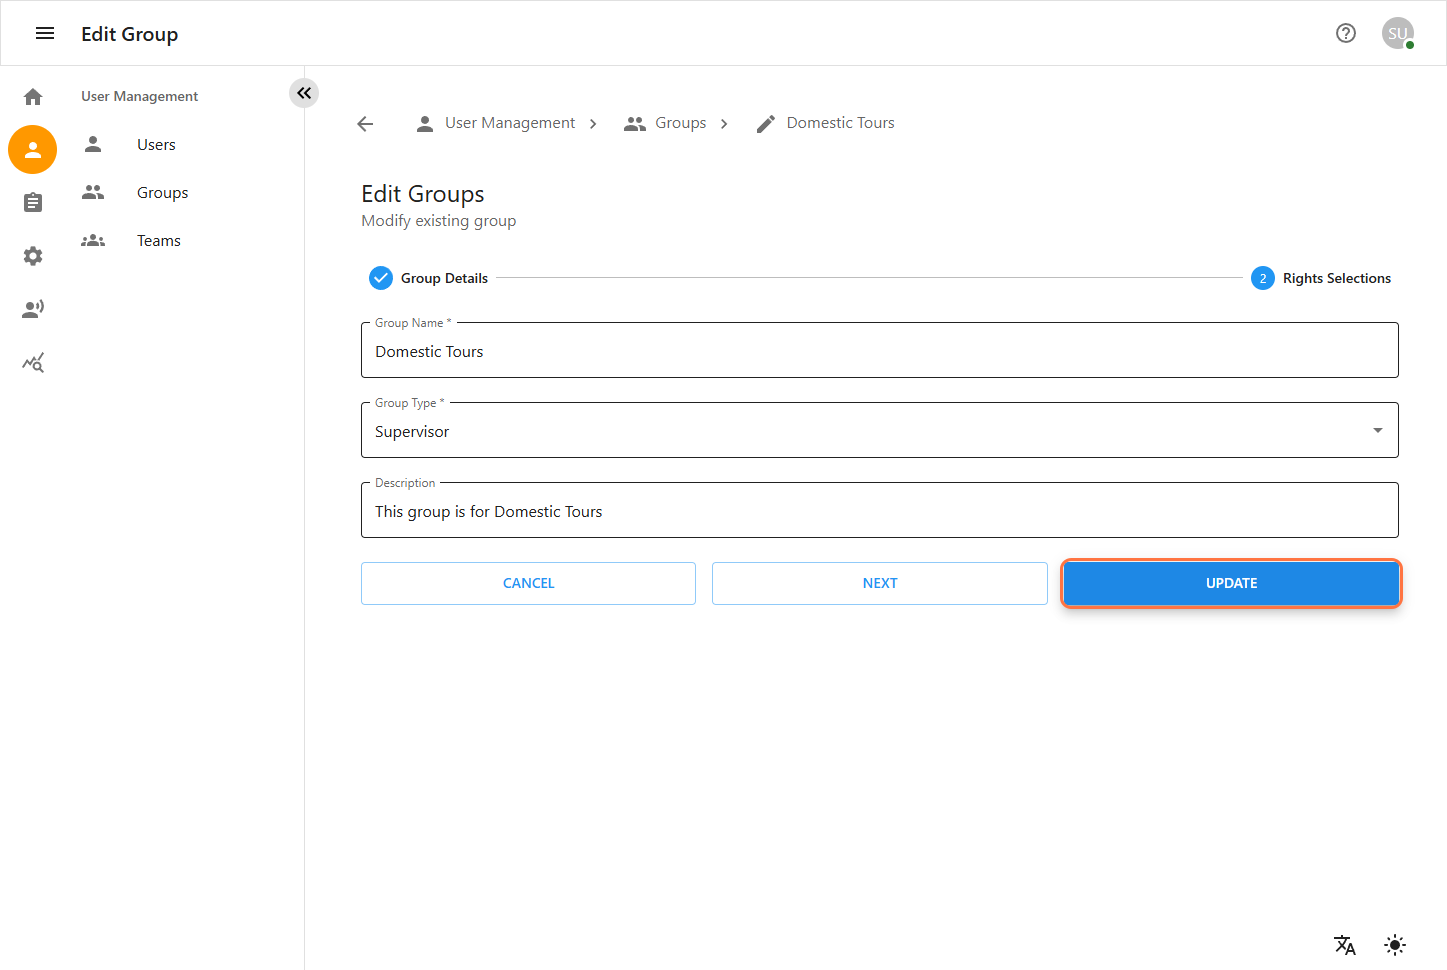
2.2 Update Group
Step-by-step instructions for updating existing groups, assigning roles, and setting permissions:
-
Navigate to User Management
-
From the left sidebar, click on the User Management icon.
-
Select the Groups option from the menu.
-
-
Edit an Existing Group
-
Locate the group you want to edit and select the checkbox next to it.
-
Click Edit to proceed.
-
Update fields like Group Name and Description.
-
Choose the appropriate Group Type and click Next.
-
-
Assign Rights and Permissions
-
Check the boxes next to the permissions you want to assign.
-
-
Update the Group
-
Click Update to finalize the group’s configurations.
-
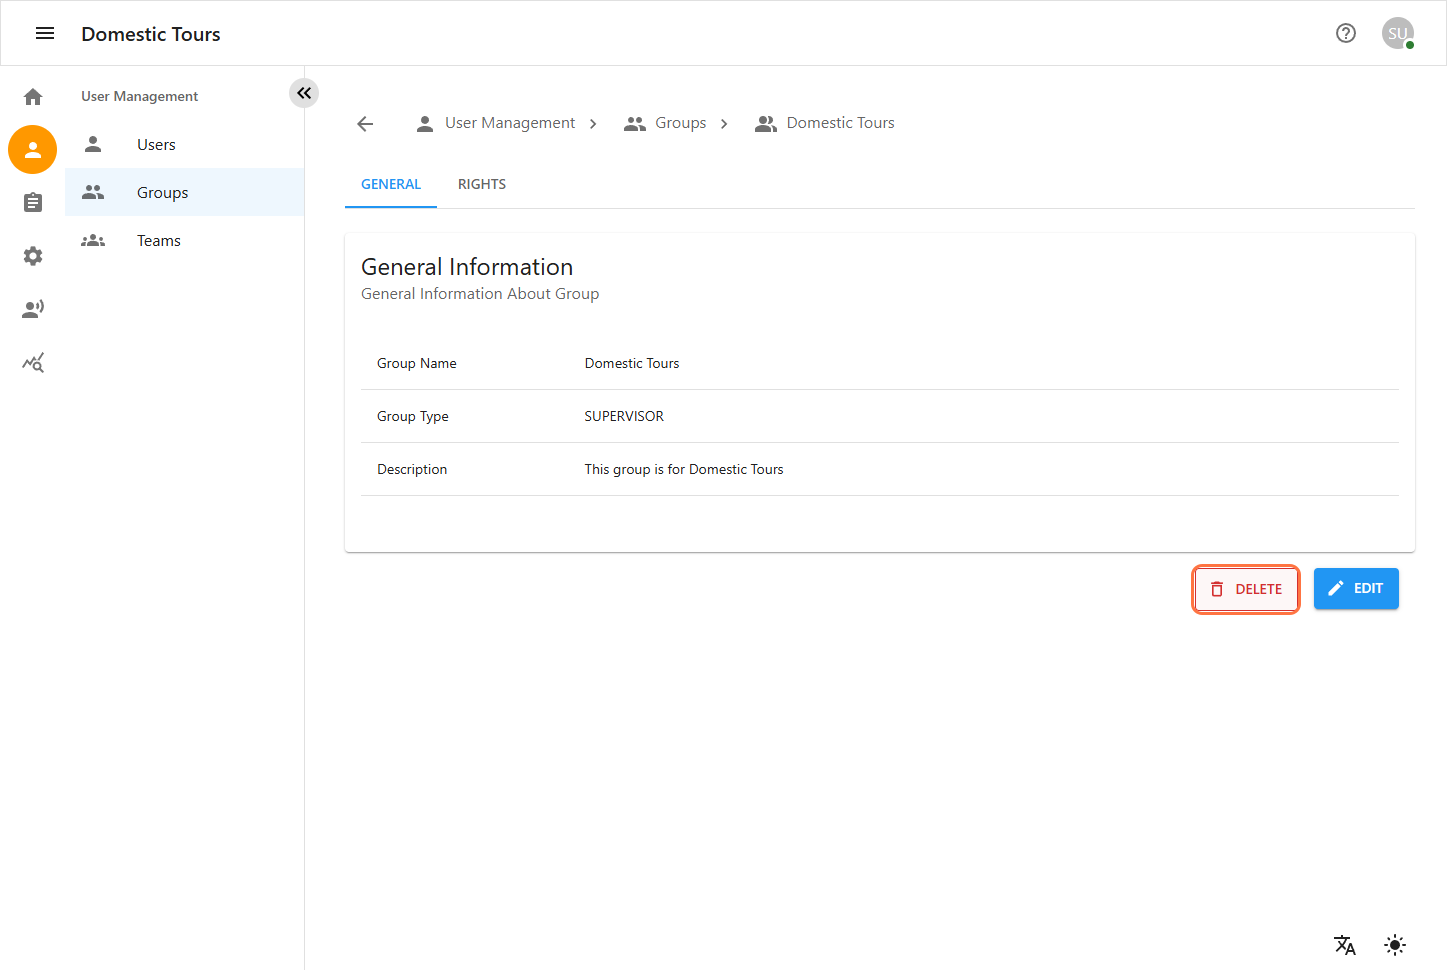
2.3 Delete Group
Steps to delete a group (single or bulk):
-
Navigate to User Management
-
From the left sidebar, click on the User Management icon.
-
Select the Groups option from the menu.
-
-
Delete an Existing Group
-
Locate the groups you want to delete and select the checkbox next to them.
-
Click Delete.
-
-
Confirm Delete
-
A confirmation prompt will appear. Click Confirm to finalize deletion.
-
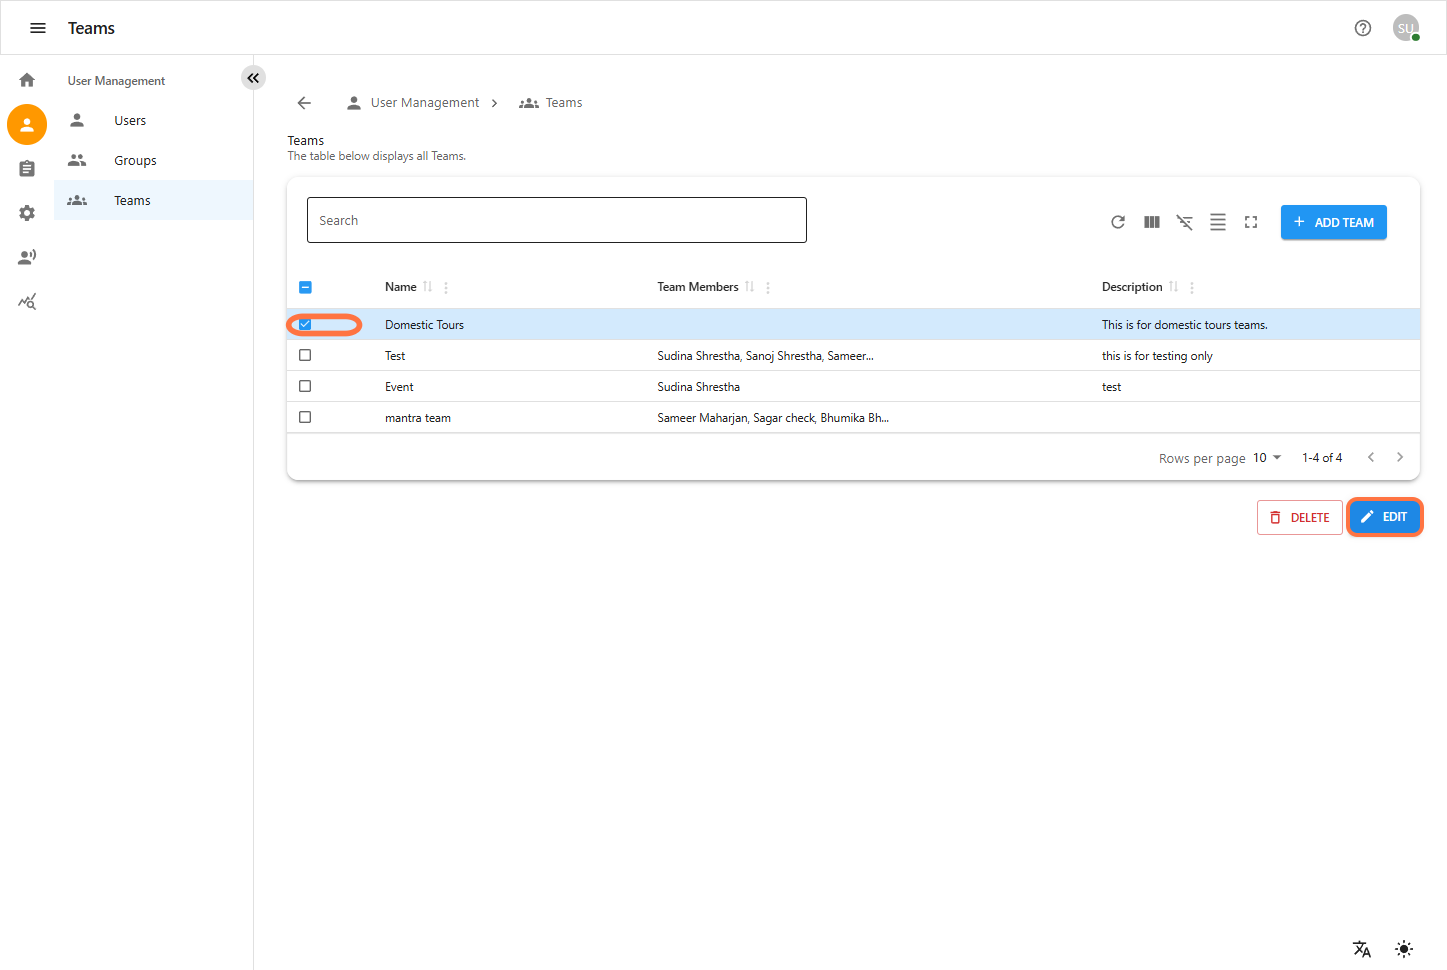
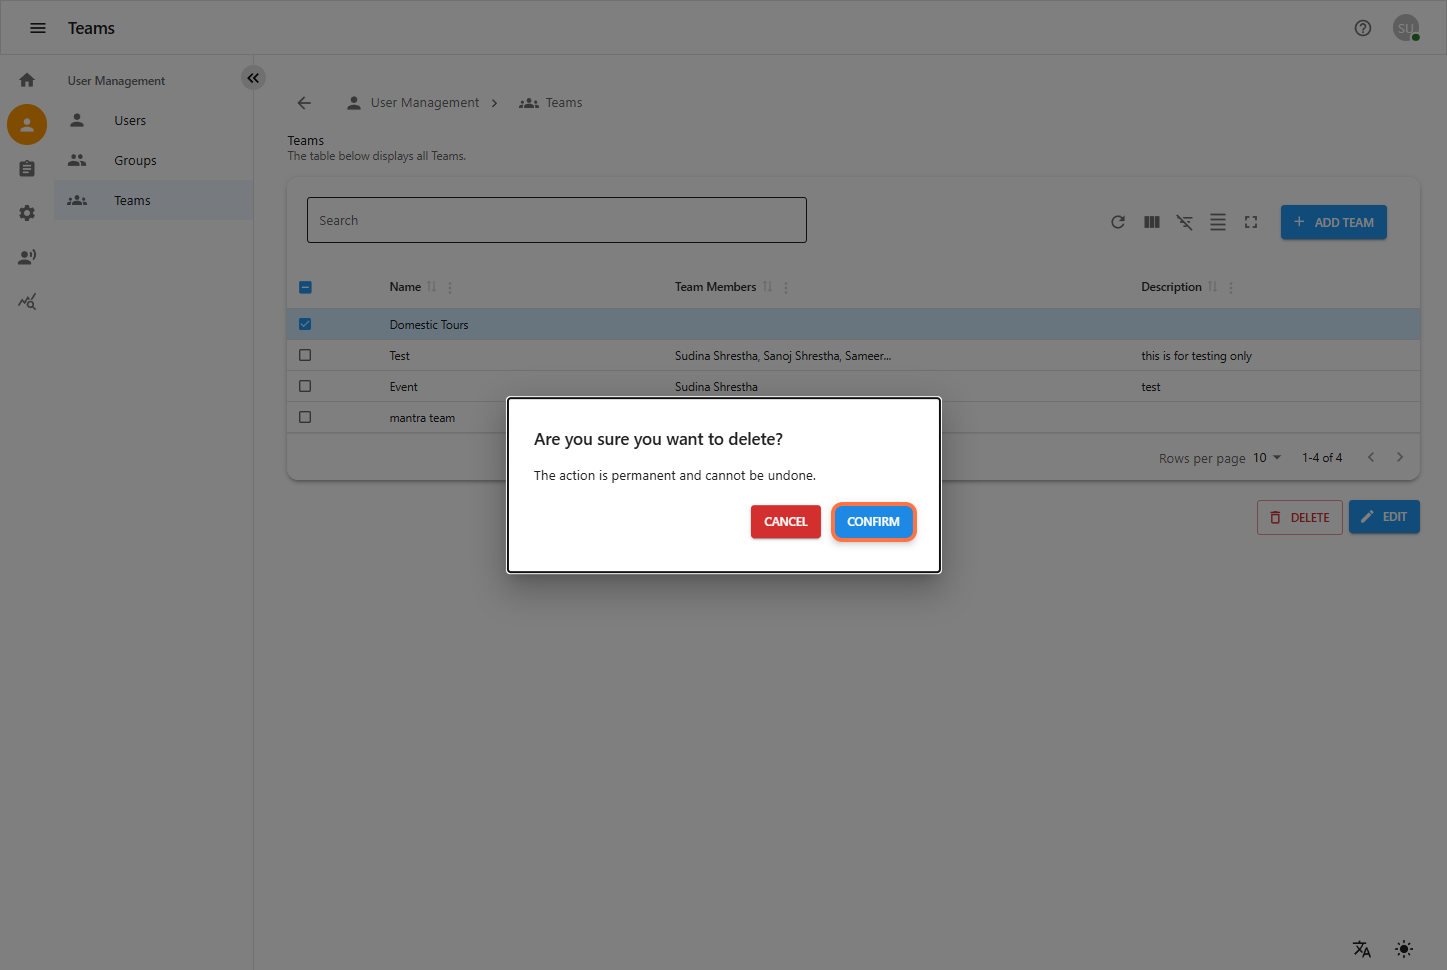
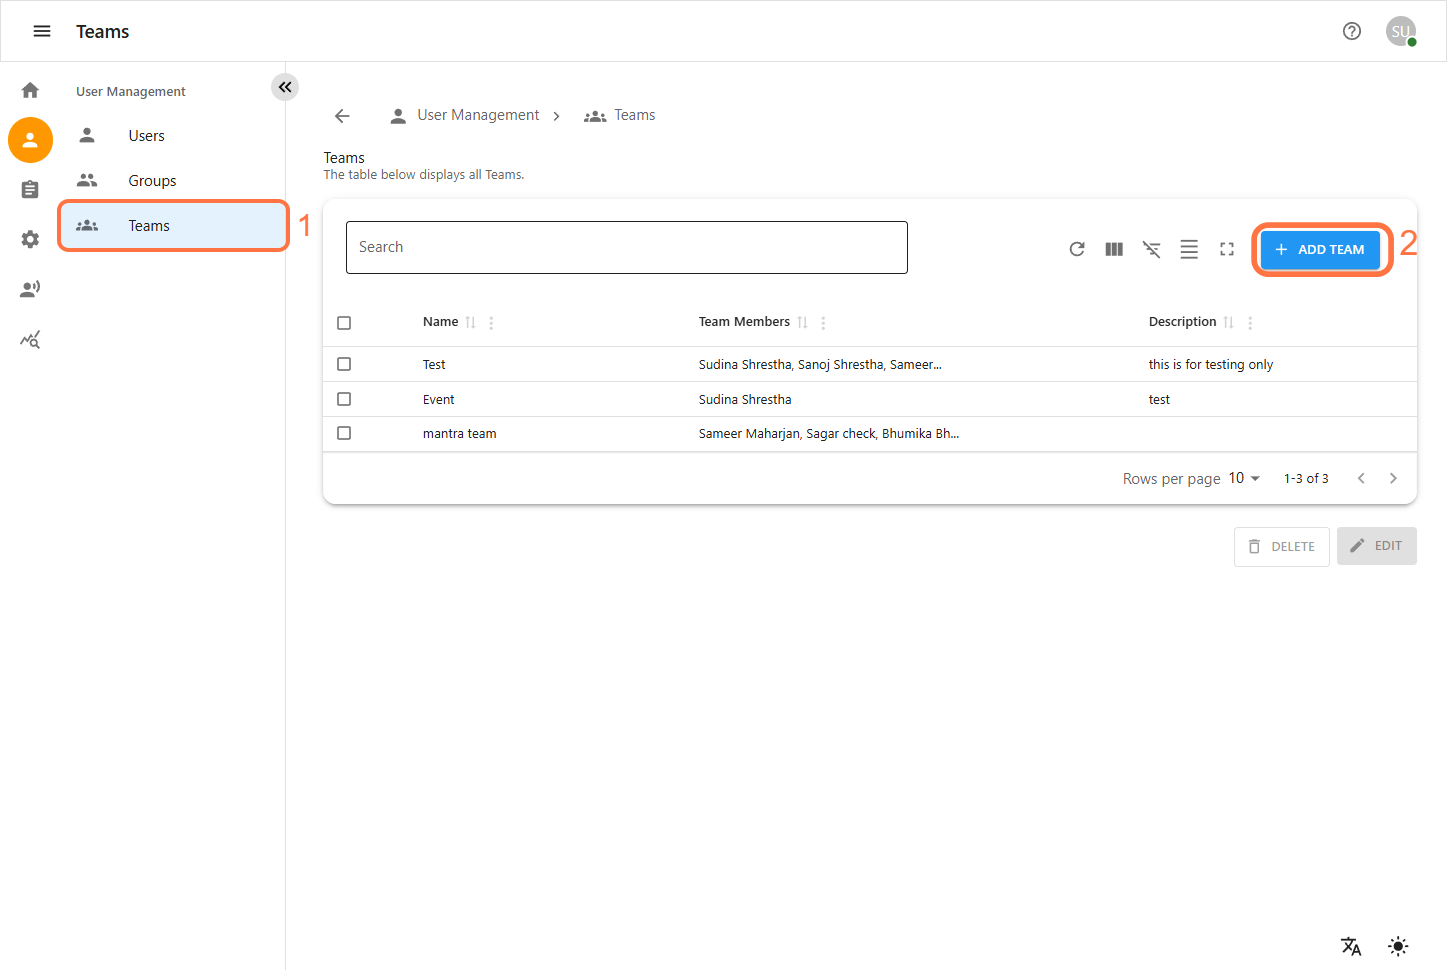
Teams
The Team Module facilitates collaboration among users with different groups and permissions. Teams can be assigned to multiple projects as needed.
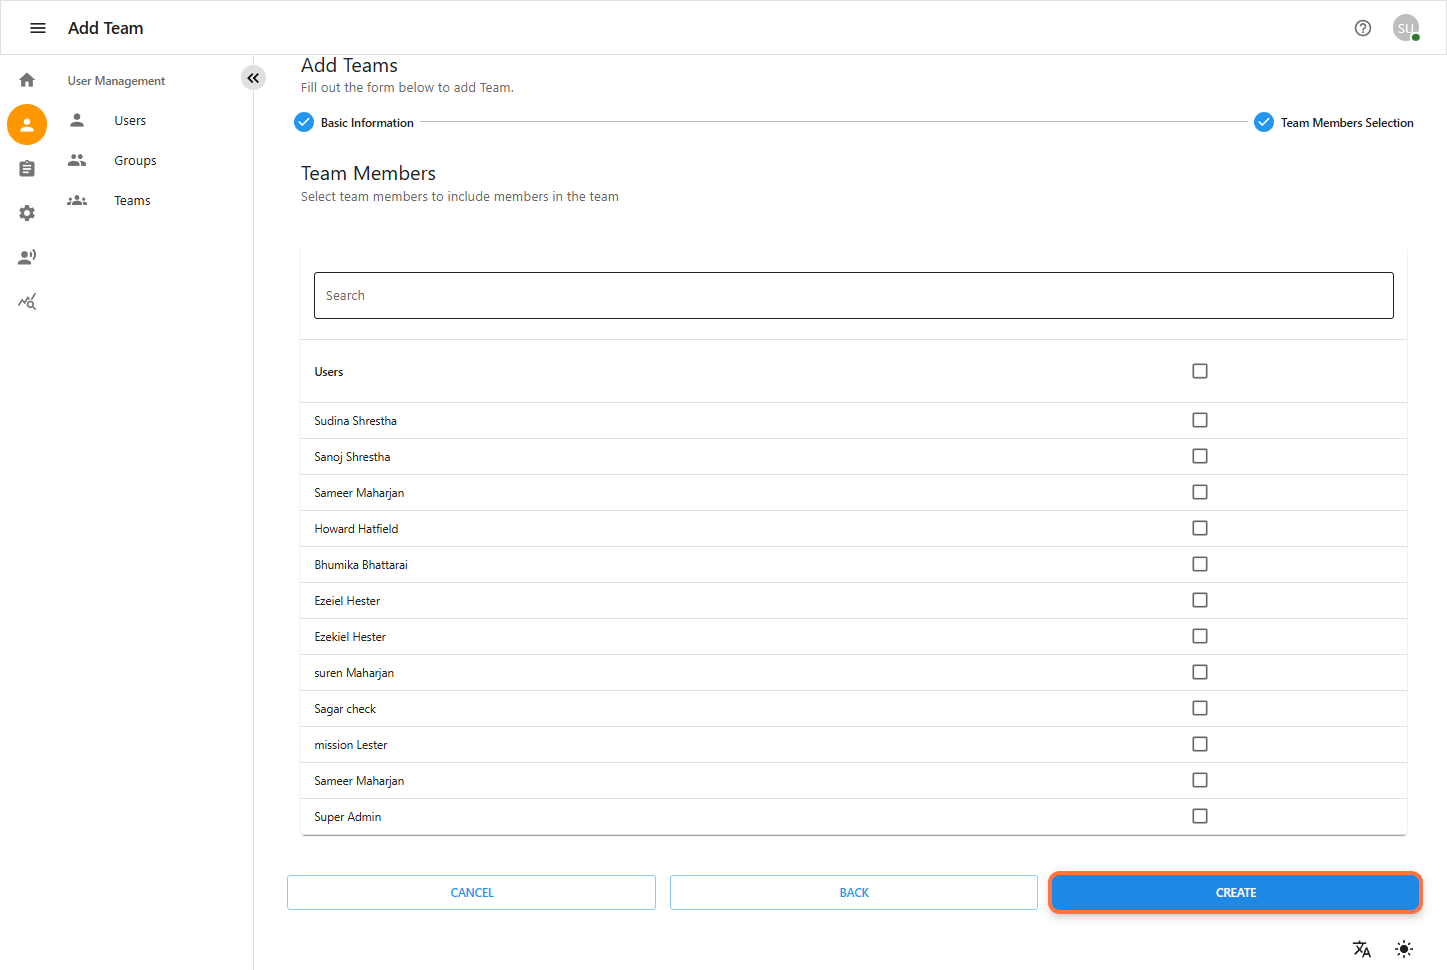
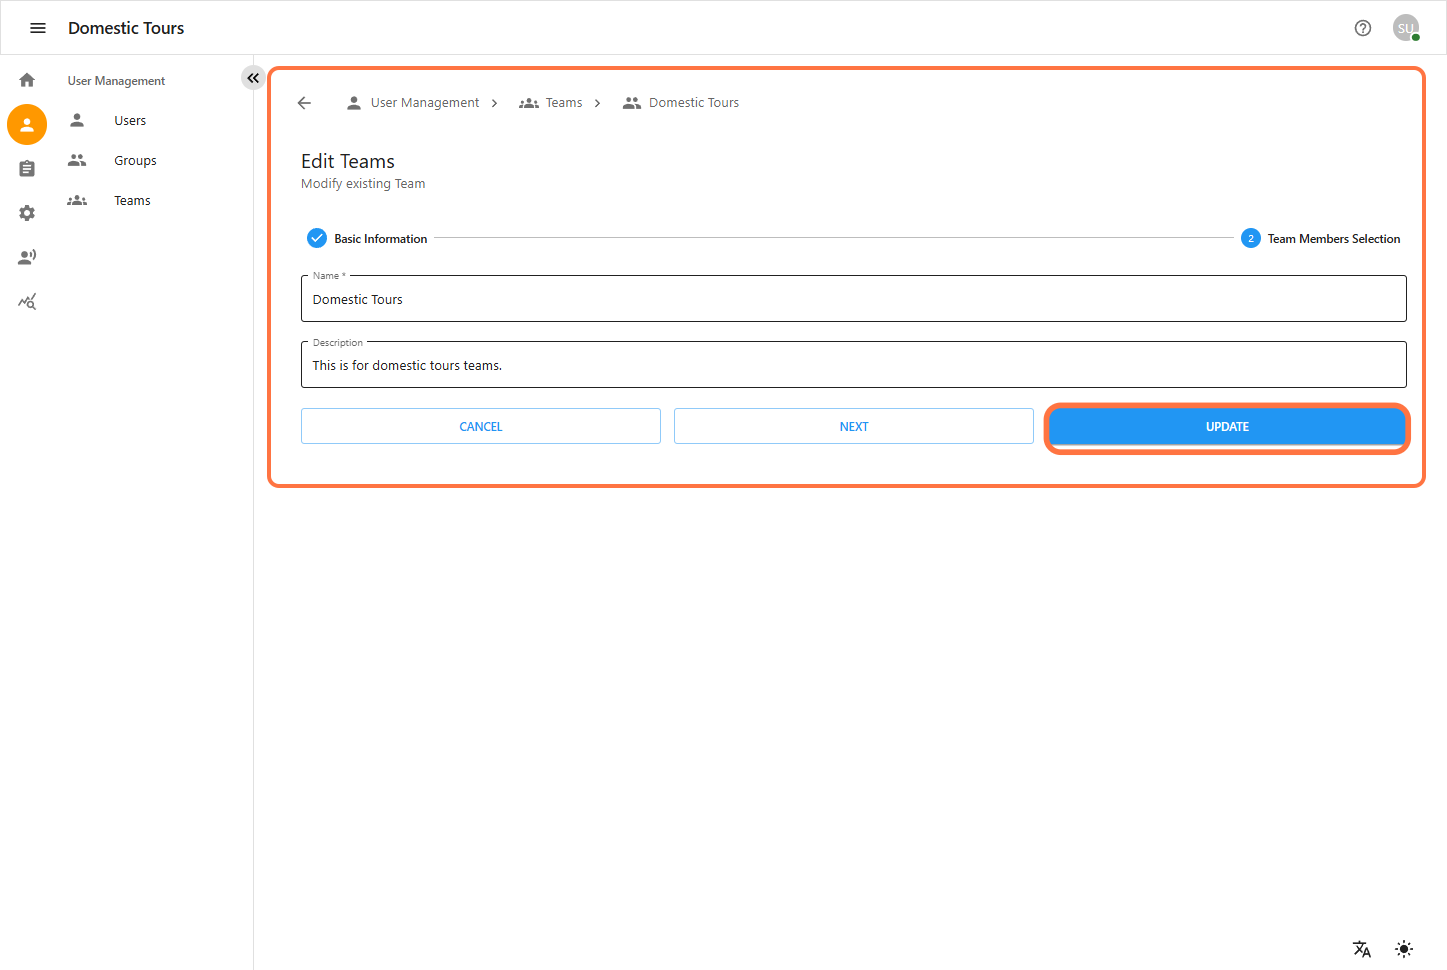
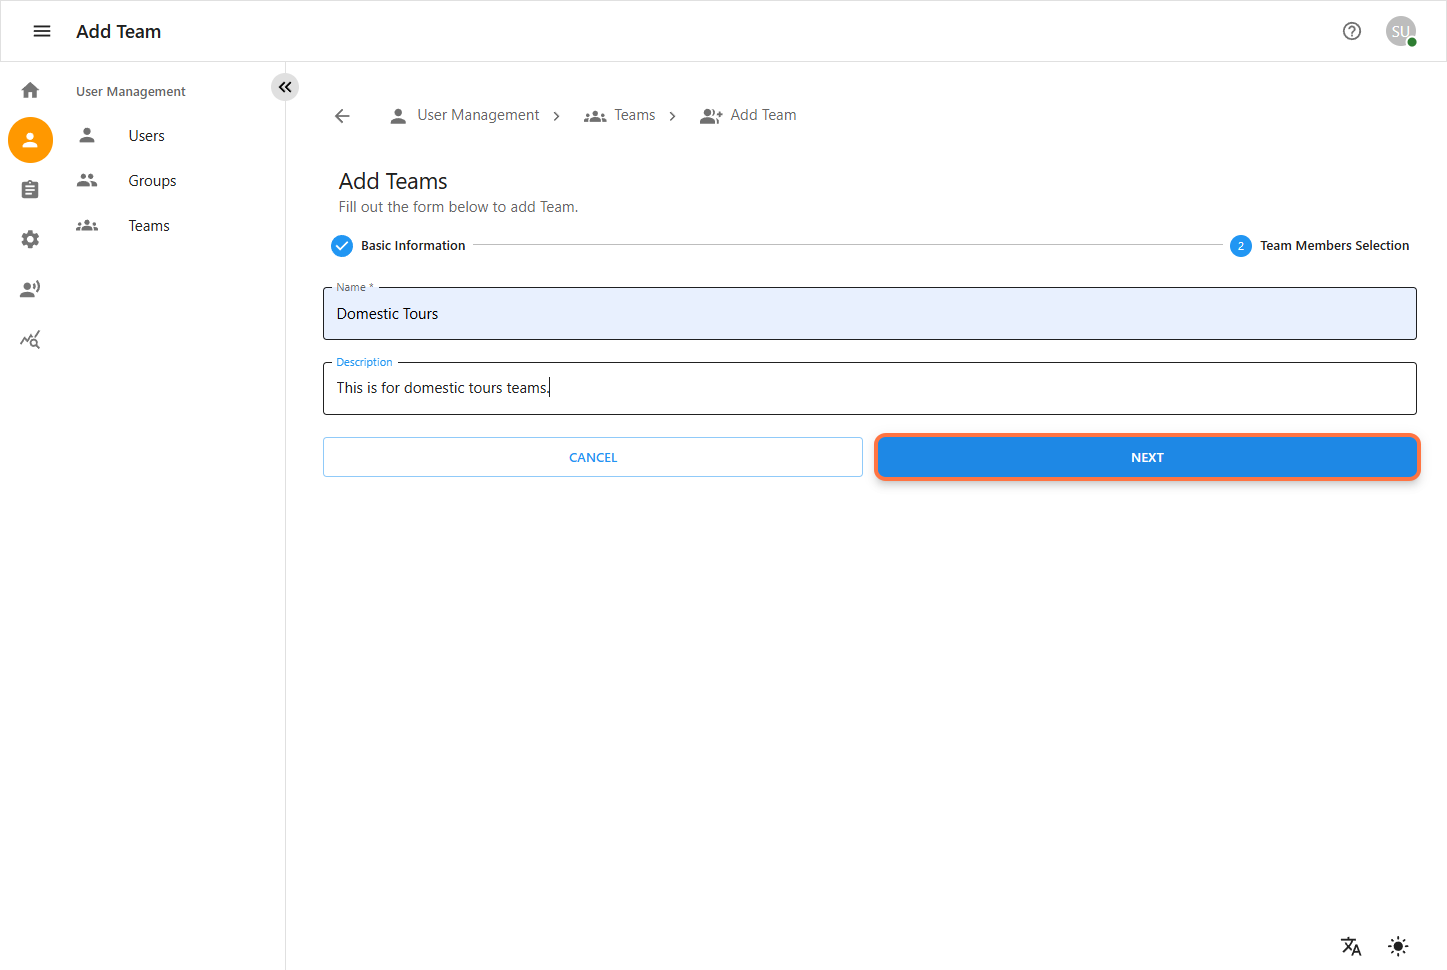
3.1 Create Team
Steps for creating a team and assigning users:
-
Navigate to User Management
-
Click on the User Management icon.
-
Select the Teams option.
-
-
Add a New Team
-
Click Add Team.
-
-
Complete the Team Details Form
-
Fill in required fields (Team Name, Description).
-
-
Assign Team Members
-
Select users to add to the team.
-
-
Create the Team
-
Click Create.
-