User Manual for Call Flow
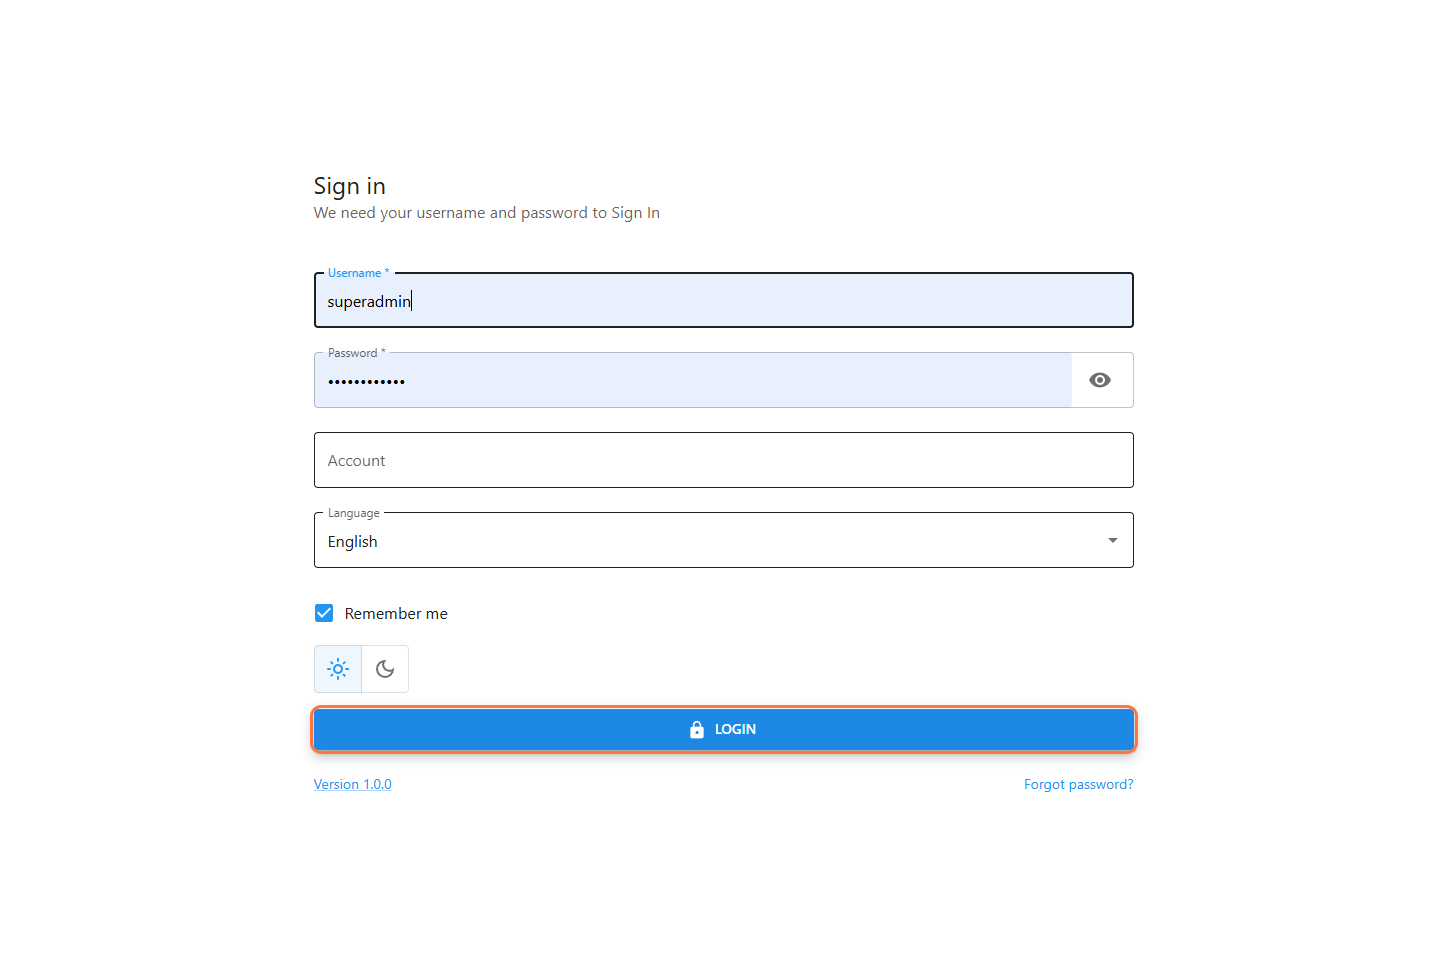
Step 1: Super Admin Login
-
Open the system login page.
-
Enter your Username and Password.
-
Select the Account Type (e.g., Super Admin).
-
Choose your preferred Language (English, German).
-
Check Remember Me if needed.
-
Click Sign In to access the system.
Step 2: Access User Management
-
After logging in as Super Admin, navigate to the User Management section from the sidebar.
-
Click on Users to open the user management panel.
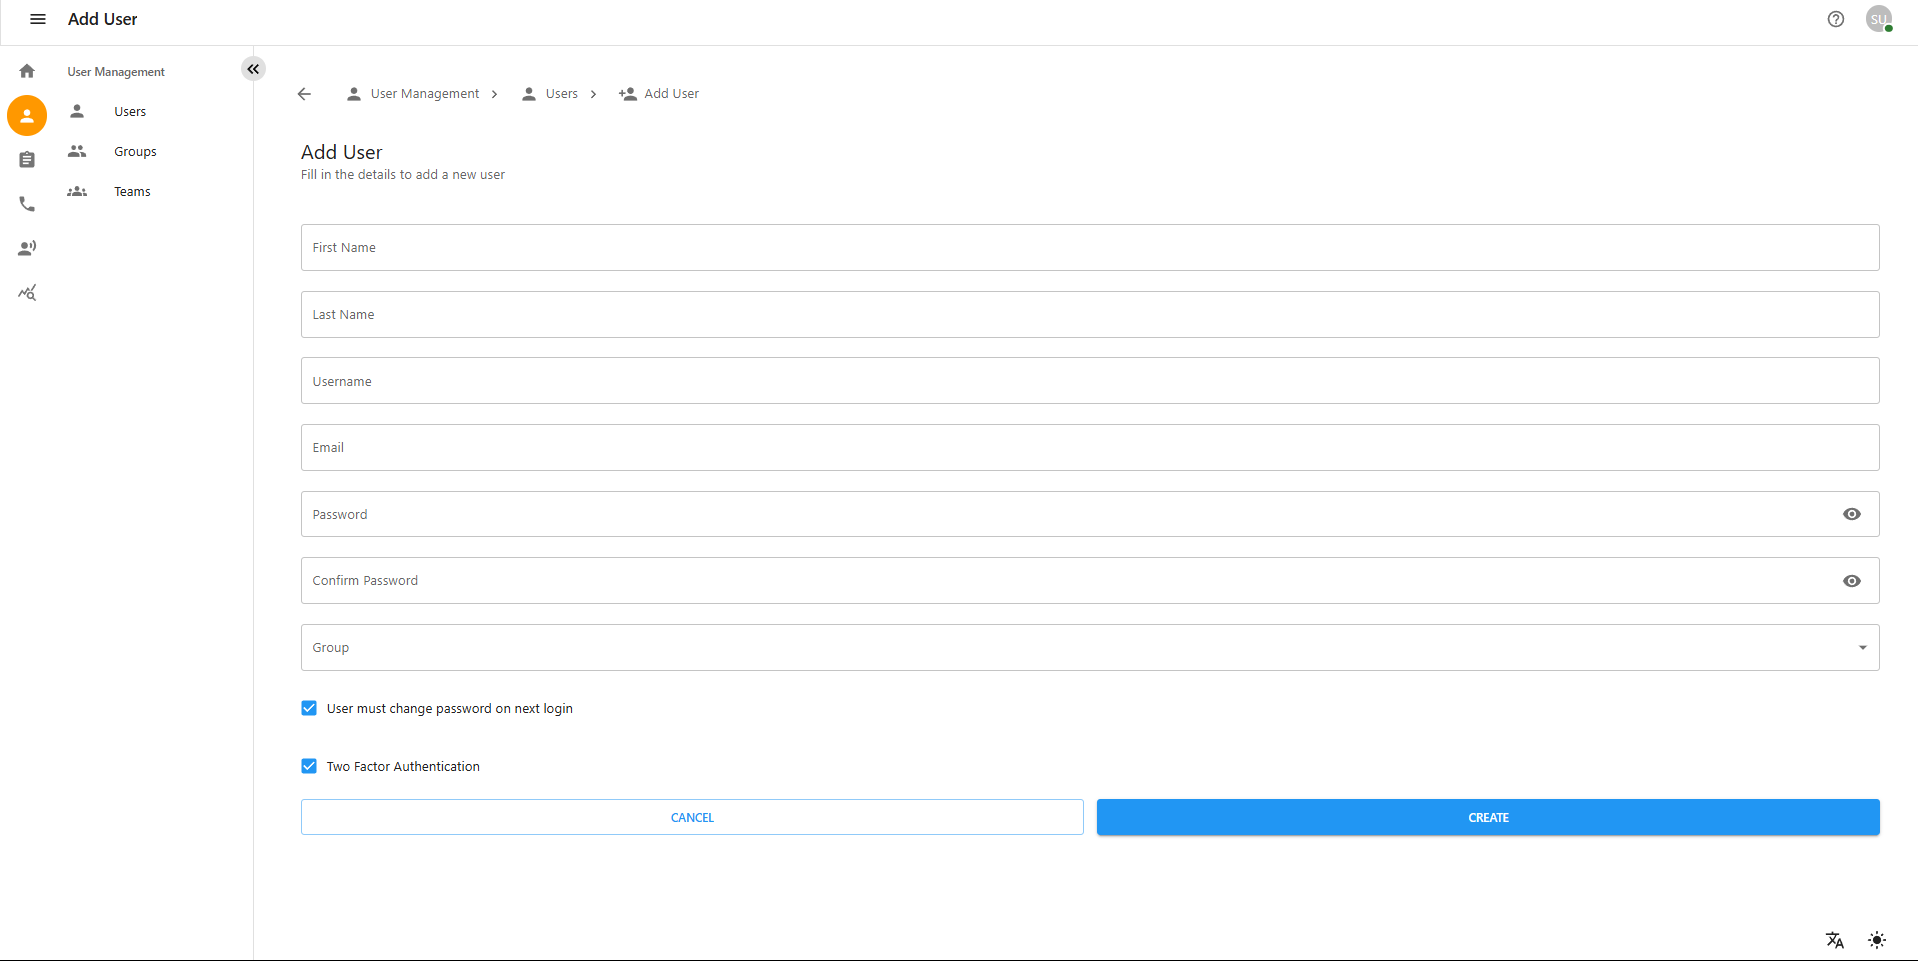
Step 3: Add a New User (Clerk)
-
Click on the + ADD USER button.
-
Fill in the following user details:
-
First Name
-
Last Name
-
Username
-
Email
-
Password
-
Confirm Password
-
-
Assign the user to a Group:
-
Clerk
-
Super Admin
-
Admin
-
-
Under the Group dropdown, select Clerk.
-
Enable User must change password on next login if required.
-
Set up Two-Factor Authentication (optional).
-
Click Create to save the new user or Cancel to discard changes.
Step 4: Assign User to a Team
-
Go to the Teams section.
-
Click on Add Team.
-
Select team members from the list.
-
Click Create to finalize the team.
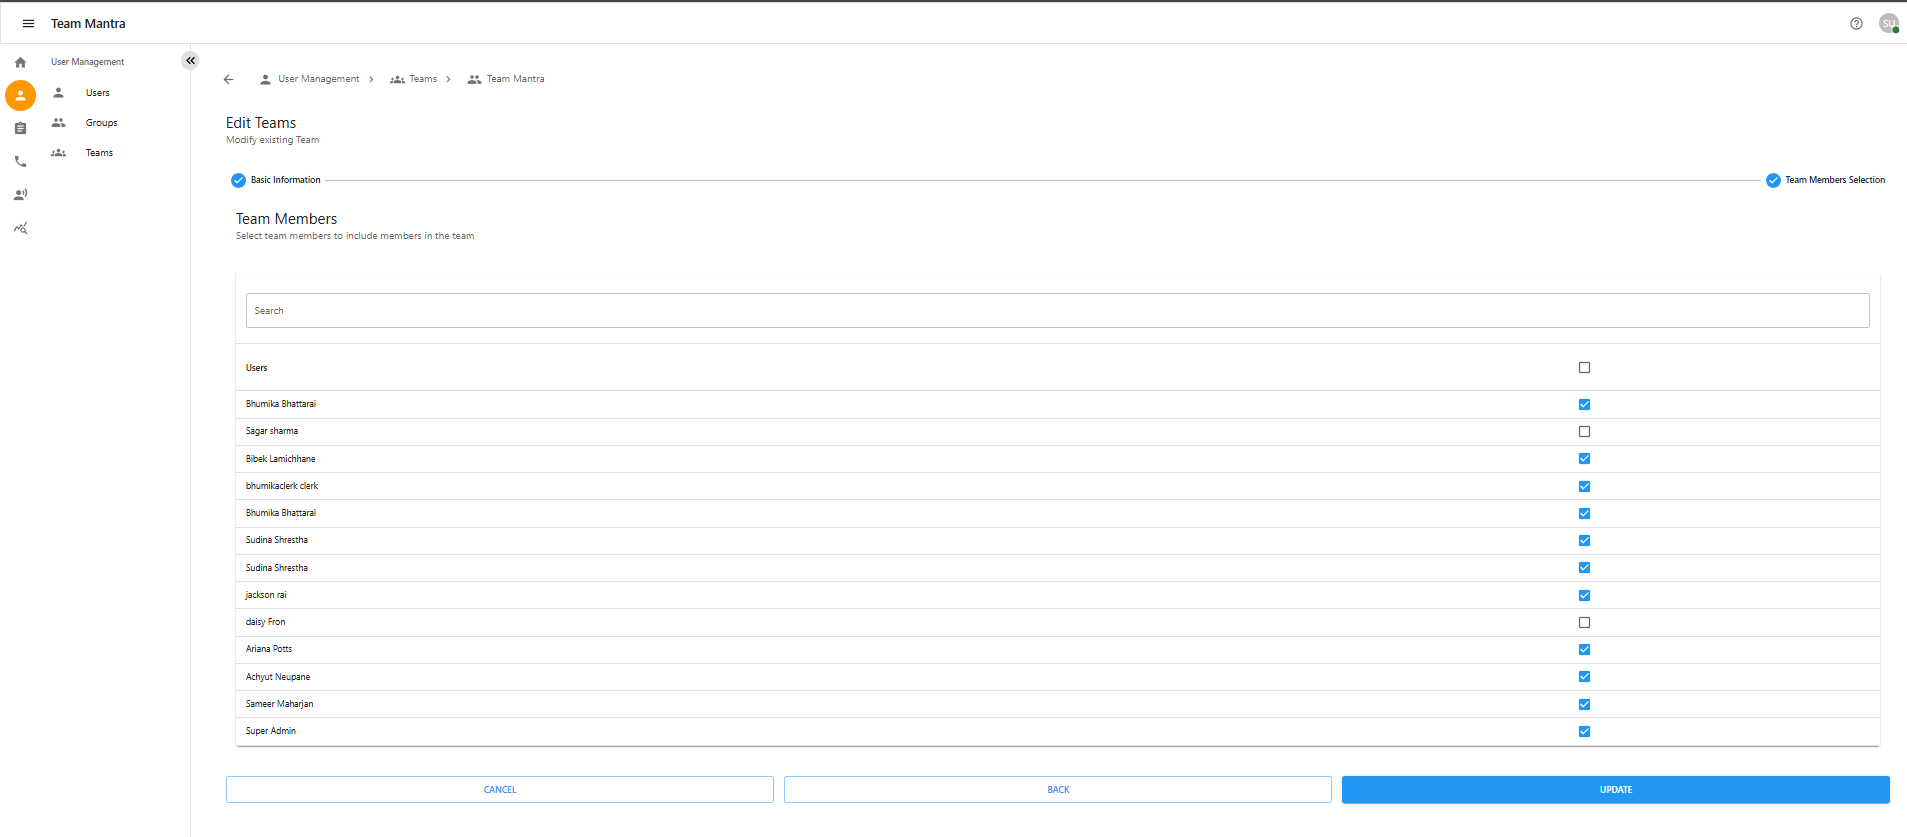
Step 5: Assign User to an Existing Team
-
Go to the Teams section.
-
Select an existing team.
-
Assign the newly created user to the selected team.
-
Save the changes.
Step 6: Automatic Extension Creation
-
Once a user is created, the system will automatically generate an Extension Number for them.
-
This extension number can be found in the User Management section next to the user’s details.
-
Ensure the extension is properly assigned for communication and routing purposes.
Step 7: Logout and Login as Clerk
-
Logout from the Super Admin account.
-
Navigate back to the login page.
-
Enter the Username and Password of the newly created Clerk.
-
Select Account Type: Clerk.
-
Click Sign In.
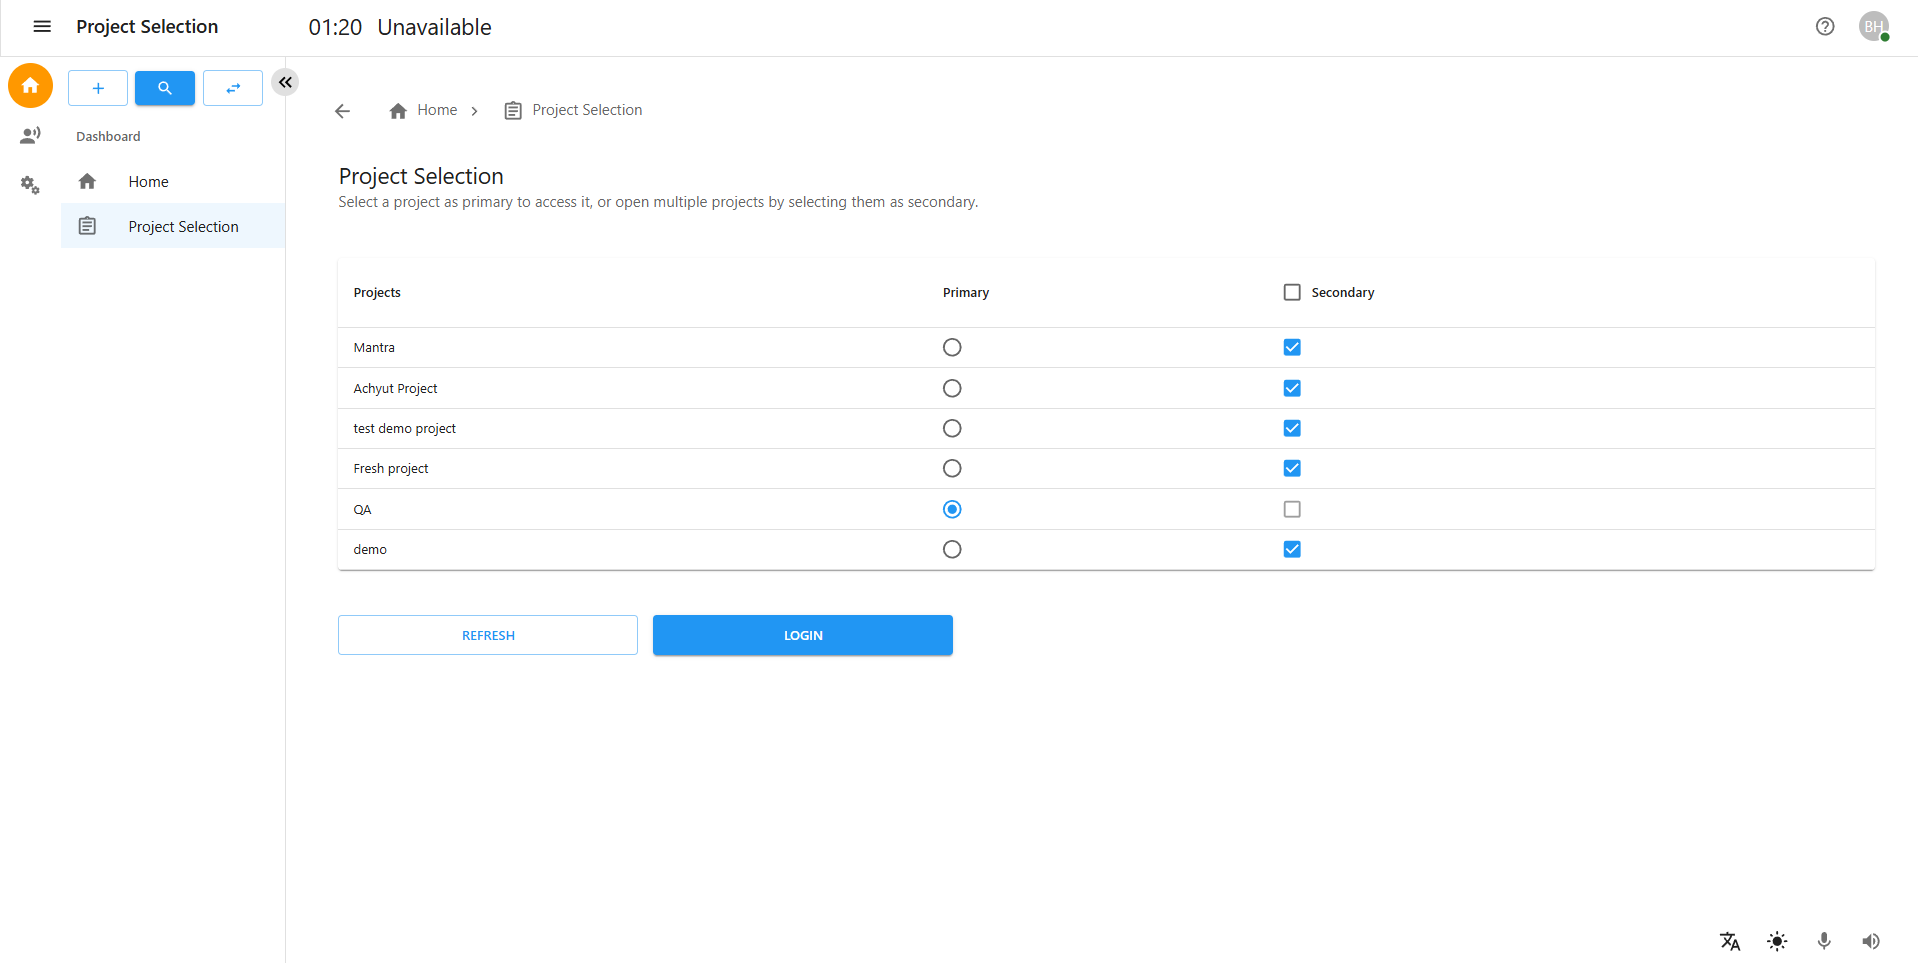
Step 8: Project Selection
-
After logging in as Clerk, the Project Selection screen will appear.
-
Select a Primary Project to access it.
-
You can also open multiple projects by selecting them as Secondary Projects.
Step 9: Receiving Calls from Clients
-
Once a Clerk is created and available, clients will start calling numbers associated with the selected project.
-
Incoming calls will be routed to the appropriate Clerk based on the Project Assignment.
-
Clerks can answer, transfer, or manage calls as required.

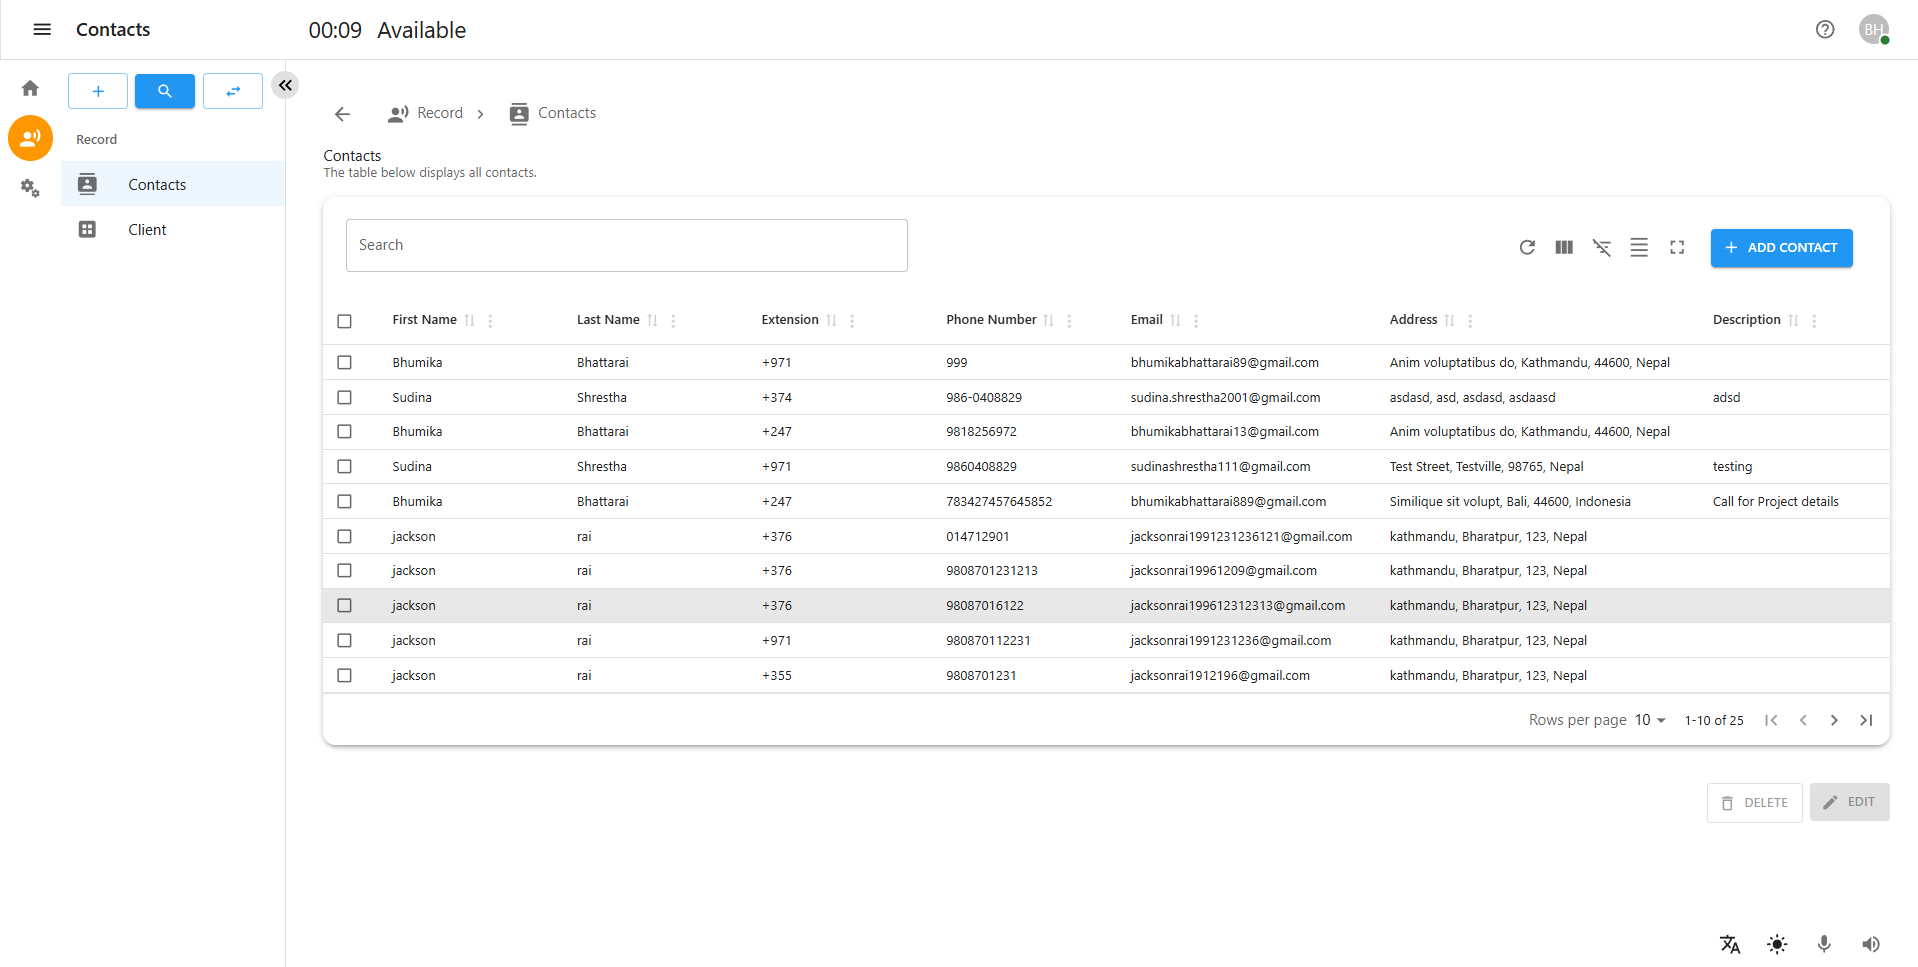
Handling Calls and Managing Client Records
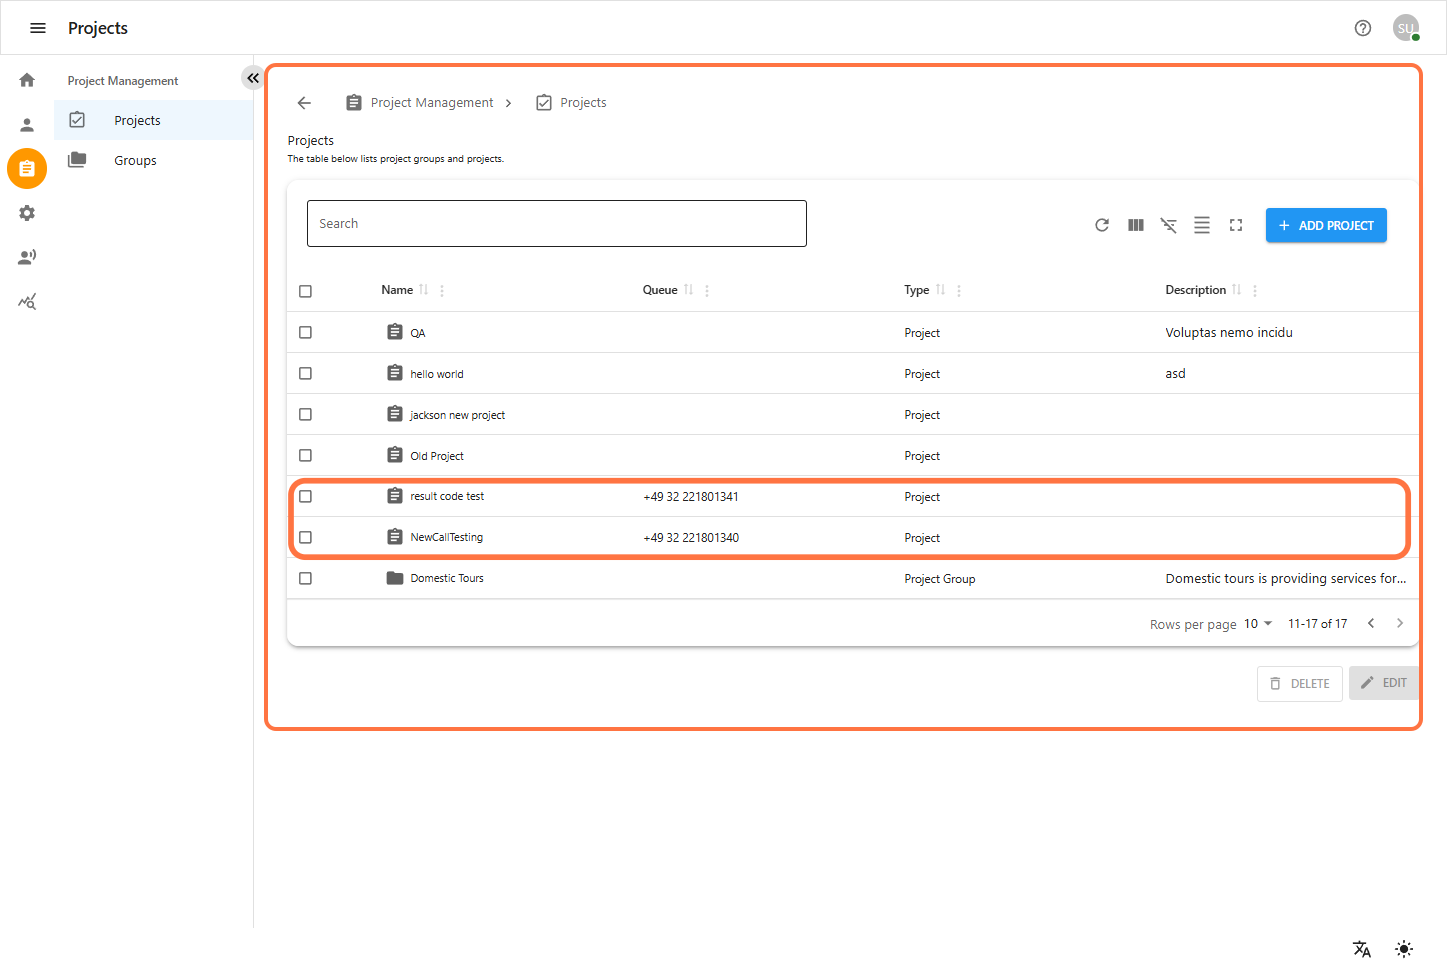
Step 1: Creating a Project
-
Before handling calls, a project must be created from the Super Admin Panel.
-
This project will be used to associate clients.
Step 2: Handling Calls
-
When a call is picked up, a Contact Form is displayed.
-
Users can fill in the caller’s details, including:
-
First Name
-
Last Name
-
Extension & Phone Number
-
Email
-
Address Information (Street Address, House Number, City, Zip Code, Country)
-
Description
-
Project Selection (if applicable)
-
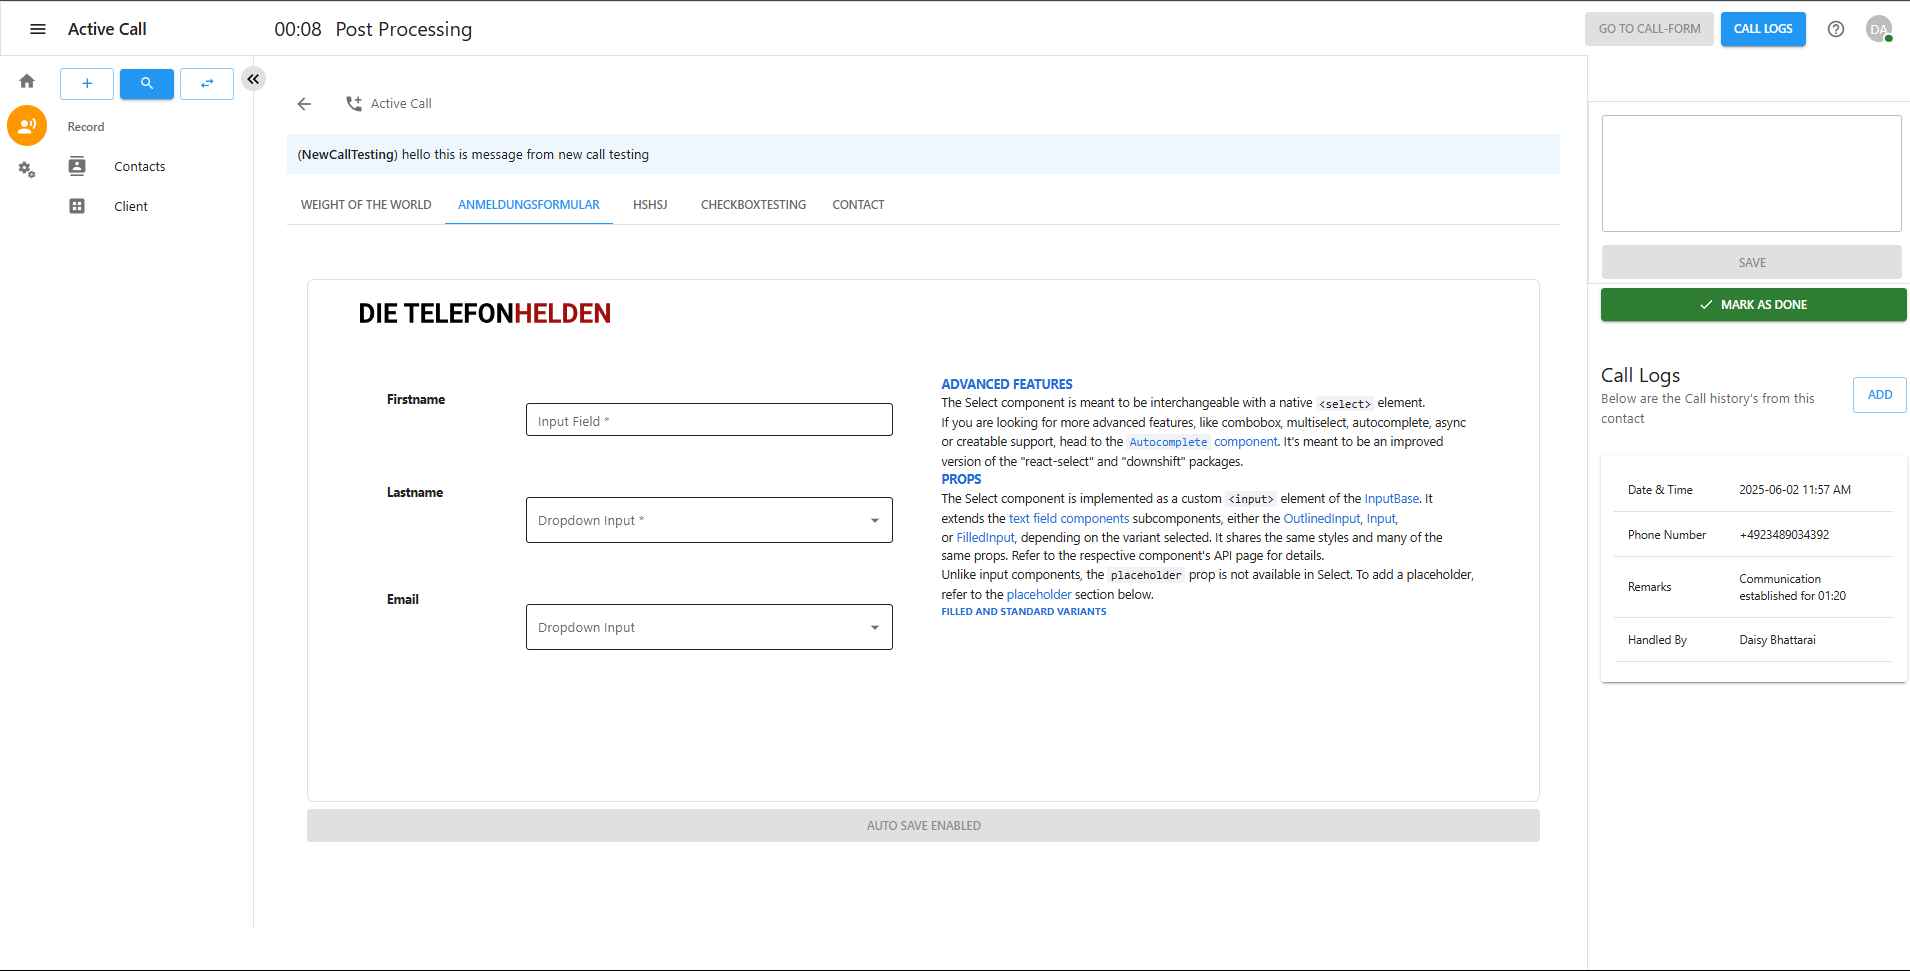
step 3: Navigating to Call Log Interface
-
During or after the call, the screen will display the Post Processing interface.
-
The top of the screen shows the active call timer and the section title: Post Processing.
-
On the left sidebar, click on the Record icon to access the call-related features.
-
Select the appropriate Project from the breadcrumb path.
-
Click on Add Log to open the log entry form.
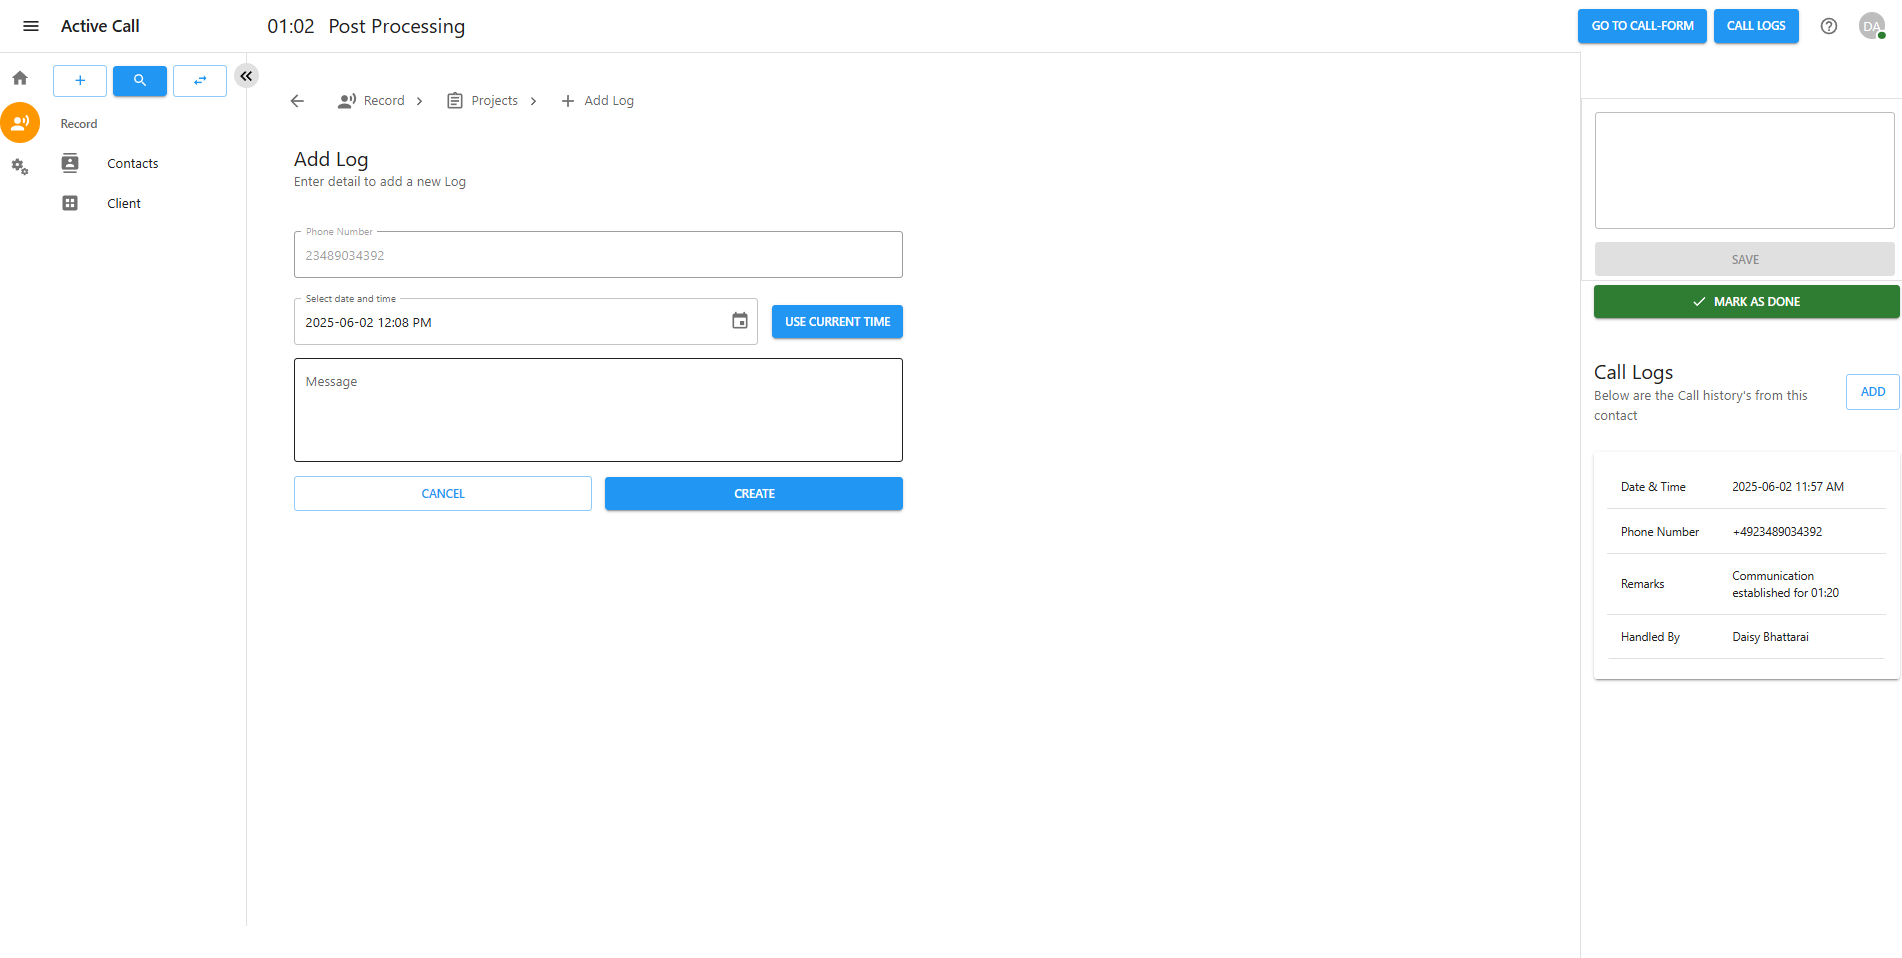
step 4: Adding a Call Log
-
After the call ends, click the ADD button on the right panel under Call Logs or use the center form.
-
Fill in the form fields as follows:
-
Phone Number: Enter the contact number (automatically prefilled if applicable).
-
Select date and time: Use the calendar or click USE CURRENT TIME to autofill the current timestamp.
-
Message: Add any notes or remarks about the conversation, such as duration, summary, or next steps.
-
-
Click CREATE to save the log.
-
The log will appear in the Call Logs list on the right-hand side.
Step 5: Managing Client Records
-
If the caller is already associated with a project, their record is saved under the respective project.
-
If the caller is not associated with any project, their record is saved as a Contact.